
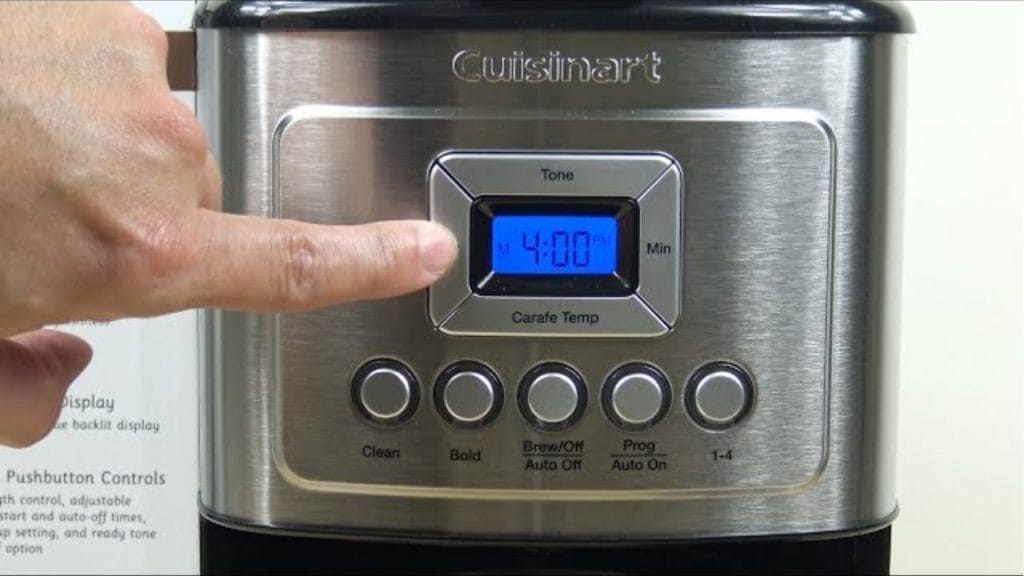
Did you know that setting up your coffee maker timer the night before can save you several minutes every morning and help you wake up to a fresh pot of coffee? If you are wondering how to set the timer on a Cuisinart coffee maker, this quick guide will walk you through the process step by step so you can use the programmable features with confidence.
How to Set the Timer on a Cuisinart Coffee Maker
Setting the timer on a Cuisinart coffee maker is simple once you know where the buttons are and how the digital display works. Most Cuisinart programmable coffee makers follow a similar process, so these steps will help with many popular models.
Step 1: Plug In and Power On
Make sure the coffee maker is plugged into a working outlet. The display should light up automatically. If it does not, press the power or ON button to activate the machine.
Step 2: Set the Current Time
Before you can program the auto brew timer, you need to set the correct clock time.
Press and hold the “HR” or “Hour” button to adjust the hour.
Press and hold the “MIN” or “Minute” button to set the minutes.
On some models, you may need to press the “Program” button first before adjusting the time.
Once the correct time is displayed, stop pressing the buttons and wait a few seconds for the setting to lock in.
Step 3: Enter the Auto Brew or Program Mode
Press the “Program” button. The display will usually show a blinking time or a programmed start time. This means the coffee maker is ready for you to set the brew start time.
Step 4: Choose Your Brew Time
Use the “HR” and “MIN” buttons again to select the time you want coffee to start brewing. Be sure to choose the correct AM or PM setting if your model uses a 12-hour clock.
For example, if you want coffee ready at 6:30 in the morning, set the timer for 6:30 AM.
Step 5: Confirm the Timer Setting
Press the “Program” button again, or simply wait a few seconds for the machine to save your setting. The indicator light should confirm that the automatic brew timer is active.
How to Use the Auto Brew Feature
After you set the timer on your Cuisinart coffee maker, fill the water reservoir, add coffee grounds to the filter basket, and place the carafe on the warming plate. Then press the “Auto On” or “Program” button, depending on your model.
When the programmed time arrives, the machine will automatically start brewing your coffee.
Helpful Tips for Accurate Timer Setup
Check the Clock Regularly
If the power goes out or the machine is unplugged, the clock may reset. Always confirm the time before setting the auto brew feature.
Use the Right Strength and Grind
A good timer setup works best with properly measured coffee grounds and the correct grind size for drip coffee makers.
Look for Model-Specific Instructions
Some Cuisinart coffee maker models include extra features like self-clean, bold brew, or 24-hour programmability. If your control panel looks different, refer to your model manual for exact button labels.
Troubleshooting Timer Issues
If the timer is not working, check that the machine is in program mode and that the time was saved correctly. Also make sure the water reservoir is filled and the carafe is in place. If the display is flashing, it may mean the clock was not fully set.
If your Cuisinart programmable coffee maker still does not start, unplug it for a minute, then reset the clock and timer from the beginning.
Final Thoughts
Learning how to set the timer on a Cuisinart coffee maker is a quick way to make your morning routine easier. Once the clock and brew time are programmed, you can enjoy fresh coffee automatically at the time you choose. With just a few button presses, your Cuisinart coffee maker timer will be ready to deliver a reliable cup every morning.


