
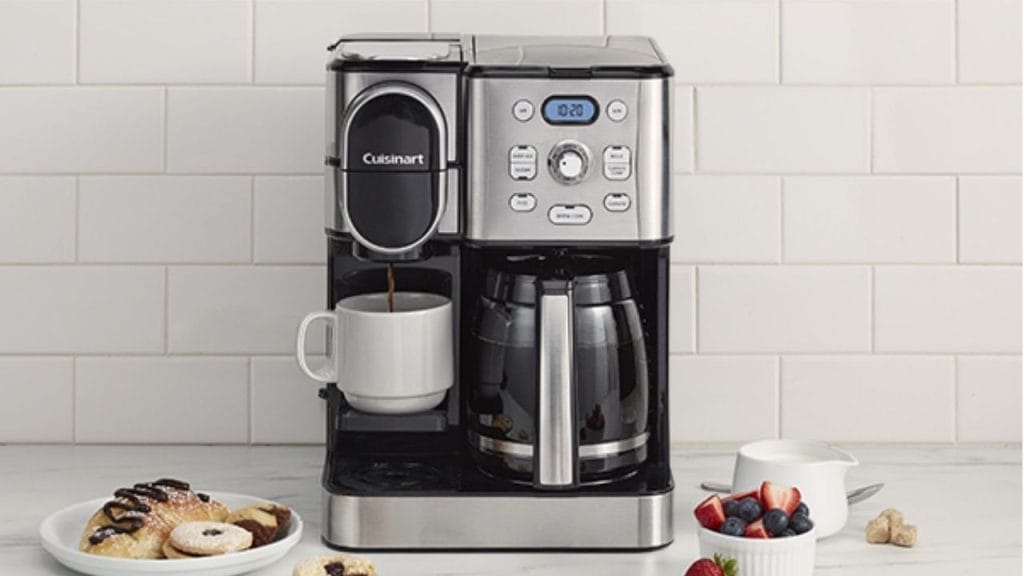
Have you ever reached for your Cuisinart 2-in-1 coffee maker in the morning only to realize the clock is wrong and your brew timer is off? Knowing how to set clock on Cuisinart 2-in-1 coffee maker is a simple but important step that helps you keep your coffee routine on schedule. Whether you just plugged in the machine, experienced a power outage, or need to reset the time, this quick setup guide will walk you through the process in a clear and easy way.
Why Setting the Clock Matters
A properly set clock does more than display the correct time. On a programmable coffee maker, it ensures your auto-brew feature works accurately, so your coffee starts when you want it to. If the clock is off, your scheduled brew time will also be off, which can lead to cold mornings and wasted coffee.
For anyone using a Cuisinart 2-in-1 coffee maker, keeping the clock updated is especially helpful if you rely on the machine’s timer function for a fresh cup at the same time every day.
How to Set Clock on Cuisinart 2-In 1 Coffee Maker
The process is usually straightforward and takes less than a minute.
Step 1: Plug In the Coffee Maker
Make sure the coffee maker is connected to a working power outlet. Once powered on, the display should light up and show the current time or a default setting.
Step 2: Locate the Clock or Time Buttons
Most Cuisinart 2-in-1 coffee makers have buttons labeled “Clock,” “Hour,” and “Minute.” Some models may use a “Program” button or similar controls. Check the control panel so you can identify the correct buttons before adjusting the time.
Step 3: Press and Hold the Clock Button
Press the “Clock” button and hold it until the time display begins to flash. On some models, you may need to press the “Set” or “Program” button instead. Flashing numbers usually mean the machine is ready for adjustment.
Step 4: Set the Hour
Use the “Hour” button to move the display to the correct hour. If your model uses 12-hour time, continue pressing until you reach the correct AM or PM setting.
Step 5: Set the Minutes
Press the “Minute” button until the display shows the correct minutes. Hold the button down if you want the numbers to change faster.
Step 6: Confirm the Time
Once the clock displays the correct time, stop pressing the buttons and wait a few seconds. The flashing should stop, and the time should remain fixed on the screen. This confirms the clock has been set successfully.
Tips for Accurate Clock Setup
Check AM and PM
One of the most common mistakes when learning how to set clock on Cuisinart 2-in 1 coffee maker is mixing up AM and PM. If you use the automatic brew feature, this can cause your coffee to start at the wrong time.
Reset After a Power Outage
If the machine loses power, the clock may reset. After plugging it back in, repeat the steps above to restore the correct time.
Refer to Your Model Manual
Cuisinart makes several 2-in-1 coffee maker models, and button layouts can vary slightly. If your machine does not respond as expected, check the user manual for model-specific instructions.
Troubleshooting Common Issues
The Display Does Not Flash
If the display does not enter setup mode, try pressing and holding the clock-related button a little longer. Also, make sure the coffee maker is fully plugged in.
The Time Will Not Save
If the clock keeps resetting, the outlet may be losing power intermittently. Try a different outlet and make sure the machine is not being unplugged after setup.
Buttons Seem Unresponsive
If the control panel is not responding, clean the buttons gently and unplug the unit for a few minutes before trying again.
Final Thoughts
Learning how to set clock on Cuisinart 2-in 1 coffee maker is a quick task that helps keep your coffee maker running properly and your brew schedule on track. Once the time is set, you can enjoy more consistent mornings and make the most of your programmable coffee maker features. If your clock resets often, a power interruption or model-specific setting may be the cause, so keep your manual nearby for reference.


