
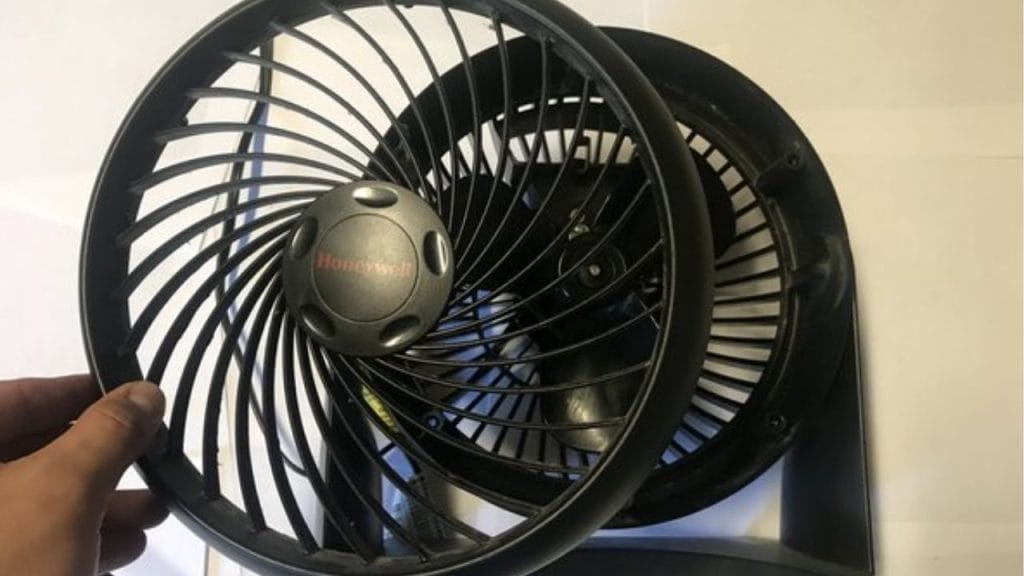
Have you ever wondered why your Honeywell fan is making unusual noise or blowing less air than before? In many cases, a careful cleaning or internal check can restore performance without replacing the unit. If you want to know how to take apart a Honeywell fan safely, this step-by-step guide will walk you through the process using simple, practical instructions.
Why You May Need to Take Apart a Honeywell Fan
Dust buildup, loose screws, and worn parts can affect airflow and motor efficiency. Taking apart a Honeywell fan can help you:
- Clean the blades and grille
- Remove trapped dust and debris
- Check for loose connections
- Inspect the motor housing for damage
- Replace a broken part if needed
Before you begin, make sure the fan is unplugged and completely powered off.
Tools You May Need
Most Honeywell fan models can be disassembled with basic household tools. Gather the following:
- Phillips screwdriver
- Flathead screwdriver
- Soft cloth
- Small brush or vacuum with brush attachment
- Container for screws
Some models may also require a hex key or pliers, depending on the fan design.
Step-by-Step Instructions on How to Take Apart a Honeywell Fan
1. Unplug the Fan
Always disconnect the fan from the power outlet first. This is the most important safety step when learning how to take apart a Honeywell fan.
2. Remove the Front Grille
Look for clips, screws, or a locking ring around the front grille. On many Honeywell fan models, the grille snaps into place. Release the clips carefully or unscrew the ring if your model uses one. Set the grille aside.
3. Take Off the Fan Blade
Once the front grille is removed, locate the blade cap or retaining nut in the center of the blade assembly. Turn it counterclockwise if it is threaded. Some blades pull straight off, while others need a gentle wiggle. Do not force it, since plastic components can crack easily.
4. Remove the Rear Grille
After the blade is off, you should see the rear grille. This part is usually held by a nut, screw, or mounting ring. Remove it carefully and keep all hardware together so reassembly is easier.
5. Open the Motor Housing
If your goal is to clean or inspect deeper internal parts, check the back of the fan base or housing for screws. Remove them with a Phillips screwdriver. Slowly separate the housing panels. Be careful not to pull on wires or internal connectors.
6. Inspect and Clean the Interior
Use a soft brush or vacuum to remove dust from the motor area, vents, and housing. Wipe down accessible surfaces with a dry or slightly damp cloth. Never spray liquid directly into the motor.
7. Check for Damage
While the fan is apart, inspect the blade, grille, and motor housing for cracks, loose wires, or worn parts. If the motor smells burnt or the wiring looks damaged, stop and contact a repair professional.
Tips for Reassembly
Reassembling a Honeywell fan is usually the reverse of taking it apart. To make the process easier:
- Keep screws and parts organized
- Reattach the rear grille before the blade
- Tighten the blade cap securely
- Make sure the front grille clicks or screws back into place
- Test the fan after reassembly to confirm normal operation
Safety Tips to Keep in Mind
When figuring out how to take apart a Honeywell fan, safety should always come first. Avoid using metal tools near exposed wiring, and never disassemble the motor if the fan is still under warranty unless the manufacturer allows it. If you are unsure about your model, check the user manual before proceeding.
Final Thoughts
Knowing how to take apart a Honeywell fan can save time, improve airflow, and help extend the life of your appliance. With the right tools and a careful approach, most homeowners can remove the grille, blade, and housing for cleaning or inspection. If a part is damaged or the motor is not working properly, professional repair may be the safest next step.


